Sunday, September 27, 2015

Photos from Super Blood Moon Total Lunar Eclipse September 27, 2015

Here are my quick total lunar eclipse photos before I go to bed, I wanted to at least get something up from my DSLR and not just photos from my iPhone taking pics of the back of the display. Here are a few keepers, and a few that set the scene.

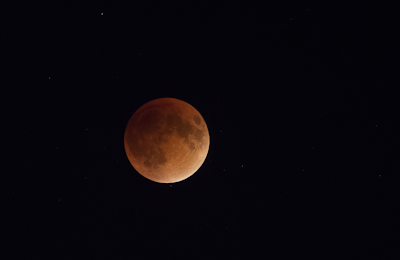
super blood moon lunar eclipse photo
Canon T5i, stack of 10 frames in Registax, each at 300mm, ISO 1600, f/5.6, 1 sec
super blood moon photo
(Left) Image straight from camera (Right) Resulting image after stacking and High Pass layer in Photoshop

total lunar eclipse sequence
Eclipse sequence composite! The haze kinda messes up my layout, but it's still a nice collection in spite of the clouds.

You can see how, especially with a dim subject like the fully eclipsed moon, stacking layers to reduce noise really cleans things up! I havne't done that for all my eclipse phases yet, but I wanted to get some of these posted quickly. Also, the thin layer of clouds might make it a waste to try to mess with stacking when there is already haze covering everything.

The haze did make for some interesting features, compared to the typical straight forward eclipse photos you see online.

september 27 eclipse clouds
Things were off to a rough start, and I was worried I wouldn't get to see any of the eclipse. I even put my telescope back inside and just focused on my DSLR because I knew I wouldn't have a lot of leisure time to mess around. Single shot Canon T5i, ISO 800, 75mm, f/5.6, 4 sec

super moon through clouds
This gives you an idea of just how much haze was in the sky. I could see the disc of the moon, but would I be able to see the shadow of the eclipse at all? Single shot Canon T5i, ISO 100, 300mm, f/5.6, 1/3 sec

penumbral eclipse
Pretty sure this is penumbral eclipse and not just a cloud. The moon was clear of any thick clouds, and was uniformly blocked by haze, so I believe the dimming on the left is the shadow from the Earth's penumbra. Single shot Canon T5i, ISO 100, 300mm, f/5.6, 1/400 sec

lunar eclipse through clouds
Clouds moving fast creating an interesting effect around the partially eclipsed moon. At 2 sec, I should have had more blur of the moon itself, but it turned out kinda neat. Single shot Canon T5i, ISO 100, 300mm, f/5.6, 2 sec

september 27 eclipse photos
Partial eclipse with appropriately exposed lunar surface. Single shot Canon T5i, ISO 100, 300mm, f/5.6, 1/400 sec

september 27 eclipse photos
More cloudy halo around the moon. Single shot Canon T5i, ISO 100, 300mm, f/5.6, 1 sec

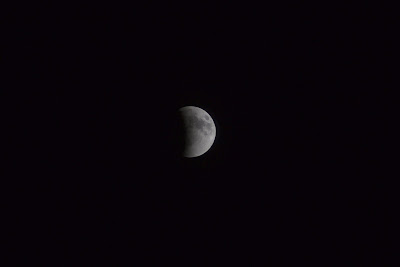
september 27 blood moon eclipse
Almost total, the moon was a tiny sliver in a bizarre shape it never makes on its own going through the regular phases. Single shot Canon T5i, ISO 800, 300mm, f/5.6, 1/2 sec

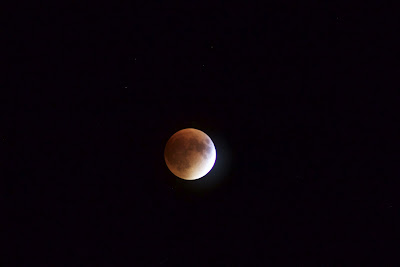
september 27 blood moon eclipse
Total eclipse but still rather bright on the right side. Single shot Canon T5i, ISO 800, 300mm, f/5.6, 1.3 sec

Wednesday, September 23, 2015

Moon Test Shot Before Eclipse (Too Bright)

I wanted to make sure I had everything set up and tested before the highly anticipated lunar eclipse coming up on Sunday night. I went out and did a few quick shots of the waxing gibbous (77%) tonight, and did a quick stack. There is a purple halo around the brighter side of the moon, and I think my settings were a little too bright (shutter was too long at ISO 100).

300mm waxing gibbous moon
Canon T5i: 20 frames stacked in Registax, each at 300mm, ISO 100, 1/200 sec, f/5.6

Clarity is pretty good though, and I didn't even do a High Pass layer on this one - just shoot and stack. I'll have to try a little faster shutter next time.

Shooting an eclipse isn't so much about planning in advance as it is about adjusting quickly (so I've found in my limited experience). The lighting changes quickly from a very bright full moon to a moon darker than the thinnest crescent.

Side note, I've been digging these Celestron countdown images on Instagram, check it out:

Saturday, September 19, 2015

#MoonNight and Science Friday Shoutout

I got a shoutout from Science Friday on Twitter the other day! There is some buzz about International Observe the Moon Night (tonight, September 19, 2015), and Science Friday was looking back at their content from a segment I did on the air. I still remember that day, what a fun opportunity.


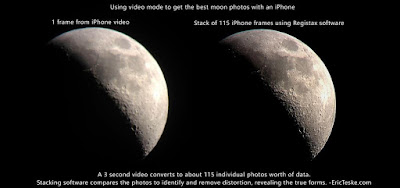
I replied with this photo (below) and a link to my article about taking even better moon photos with an iPhone by using video mode. I made the photo just for Twitter and it got quite a few retweets so I thought I'd also post it here.

sharp iphone moon video
Comparing a single frame of iPhone video to a stack of 115 frames taken from a 3 second AVI video file


I didn't realize until just now, but I've actually done some observing / photography on International Observe the Moon Night every time for the past 3 years - and usually just as a coincidence. Here are my posts from 2012, 2013, and 2014. Who knew I was being so inadvertently consistent!

For posterity, here is my moon photo from tonight, a combination of 20 frames each at f/8, 1/60 sec, ISO 100, 300mm. It's a little rushed, I'm not sure if that's why it's a little fuzzy or if it was the atmosphere. Blame it on the atmosphere!

observe the moon night
Observe the Moon Night 2015

Tuesday, September 15, 2015

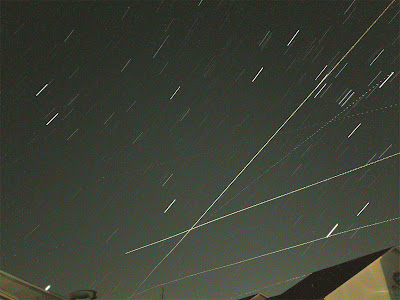
Night Sky iPhone Photos with In-App Star Trails

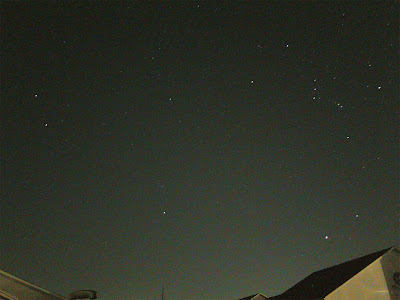
I woke up last night to let the dog out and got distracted by the rising Winter Hexagon of stars. I can't wait to see this part of the sky on the regular later this winter. It's a particularly good target for iPhone night sky photos because the bright stars show up well even on the tiny iPhone camera.

I propped the iPhone up on a small stand (the same one I used here). The app I used is called Night Cap Pro and it does a great job!

iphone star trails
Same photo as below, but I turned the brightness down a little bit to make the sky less pale gray and make the stars pop.
iphone star trails
Same photo as above straight out of the iPhone, all star trails are done in-app with long exposure. This was about 10 minutes. That bright blob to the bottom left just coming over the roof is Venus, the rest is Orion, Gemini, and some planes.
orion and gemini with iphone
I also used the star trail mode to make this image. The star trail mode actually does a better job than the noise reduction mode at cleaning up the sky for a nice regular star photo. This was about 20 seconds and you can just barely see trails.
pleiades and perseus with iphone
I put the phone off the side of the table and pointed it straight up to see how it would do without light pollution on the horizon. I was so happy to see my favorite constellation Perseus and the instantly recognizable Pleiades cluster. So cool even on an iPhone photo! This one is also straight out of the camera.

Sunday, September 6, 2015

My DSLR Moon Photo Workflow with Screenshots

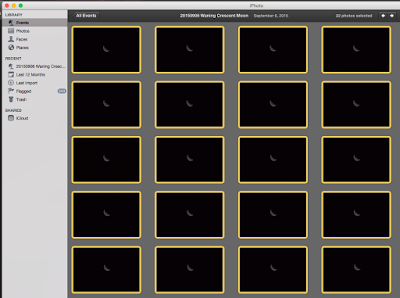
iphoto moon photos
Let's pick up assuming we already took the photos. Here I have 22 raw files loaded into iPhoto. I highlight the clear photos that look the best, and try to pick a clump that are right next to each other (less time between photos makes it easier to stack them later on).

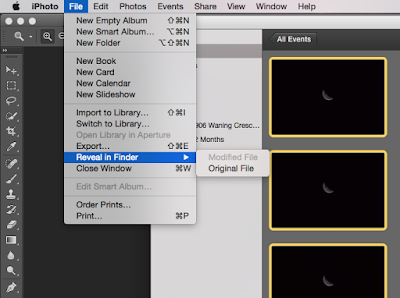
raw images in finder
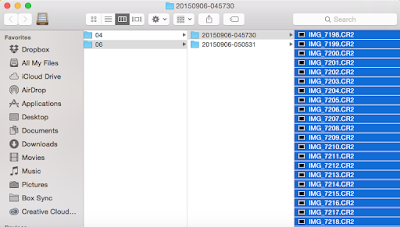
Go to iPhoto > File > Reveal in Finder > Original File. We want to use the RAW files not the JPG files that iPhoto automatically makes to preview.

raw images in finder
Select the RAW files in Finder and drag them to Photoshop CC.

adobe camera raw
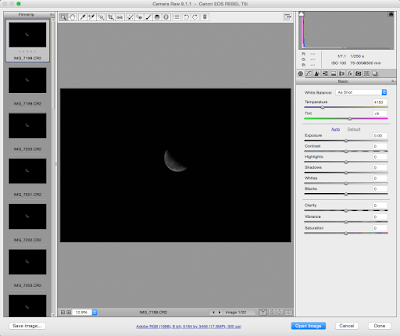
Photoshop CC recognizes the RAW files and opens them in Camera RAW rather than the regular Photoshop window.

adobe camera raw
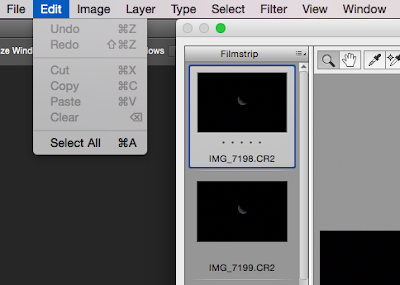
Select all of the images in the left hand column. We want to apply any changes we make to all of them not just the first one.

crop in adobe camera raw
We are going to apply a crop just to cut down on the file size and make it easier to work with in Registax. We're just cutting out a lot of black background. Remember the moon is moving, so it's going to be in a different position in each image. Make sure you leave enough room in the crop for all of the different positions not just the first frame.

crop in adobe camera raw
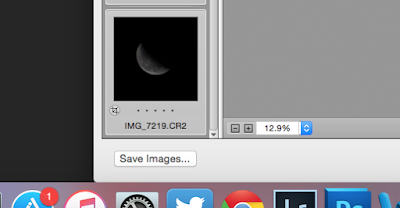
Apply the crop to all and save your images...

save in adobe camera raw
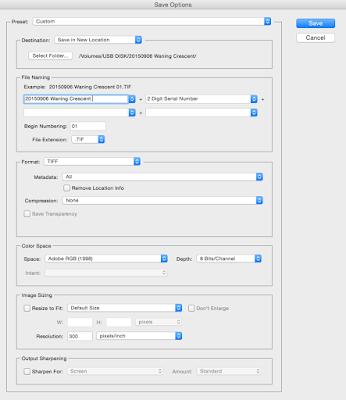
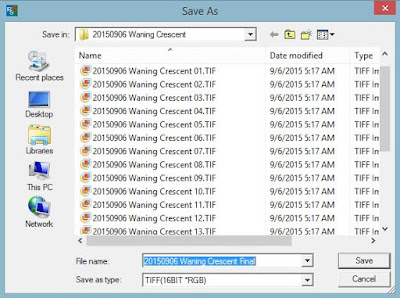
We're saving as TIFF files in a new folder on the flash drive (remember, I'm taking it back and forth between computers). Camera RAW will give the files sequential numbered file names.

save in adobe camera raw
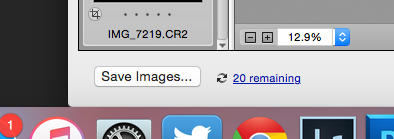
It's applying the crop and saving each cropped file as a TIFF.

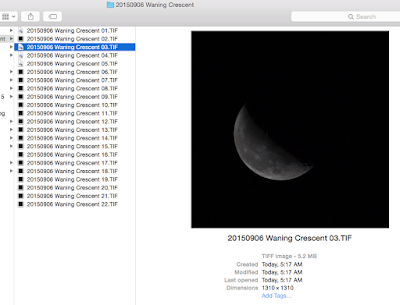
moon tif files
Our new batch of cropped TIFF files are visible in Finder. I'll take these on a flash drive to my PC laptop to stack in Registax.
 
moon tif files
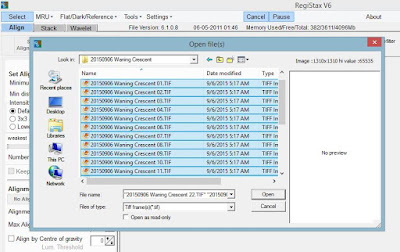
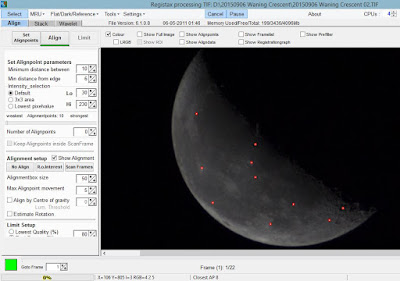
I open Registax and select all my moon TIFF files.

registax
I like to apply my own alignpoints rather than having the software guess. I don't use very many, and I hand pick spots with high contrast, such as craters, bright spots, or areas on the line between dark and light regions. I also stay away from the edges.

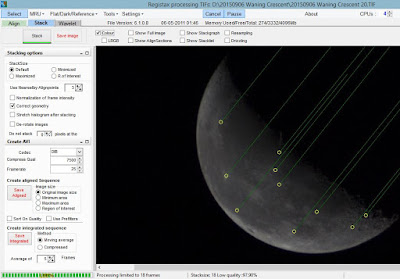
registax
When you align, you are looking for the software to track parallel lines for each of your align points. If the green paths cross, it means something is wrong and it thinks one of your points is going a different direction from frame to frame compared to the others.

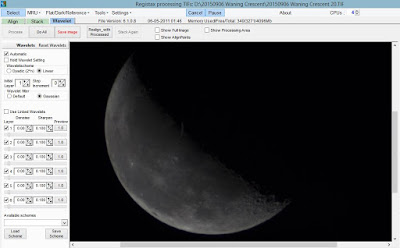
registax
After I stack I go to the Wavelet tab to further refine the image. It's looking pretty good right? Just wait, the Wavelet tab is going to make a huge difference.

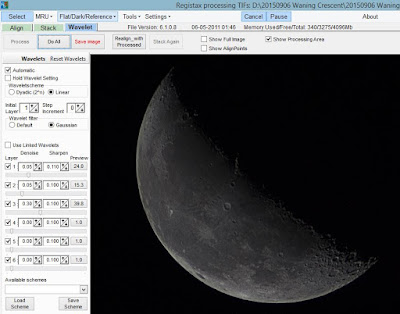
registax wavelet
I play with the sliders on the left and watch my image sharpen and also add noise. This is a constant battle between increasing sharpness and increasing noise. You can't just crank it all the way up. Adjust to suit your personal taste. I personally don't like to go overboard, but just enhance the edges a bit.

registax wavelet
click 'Do All' to apply the Wavelets to the entire image and then save your file. Again, I am saving as a TIFF so I don't lose any clarify to compression.

At this point I switch back to my Mac, taking my final stacked photo on a flash drive from my laptop.

photoshop duplicate layer
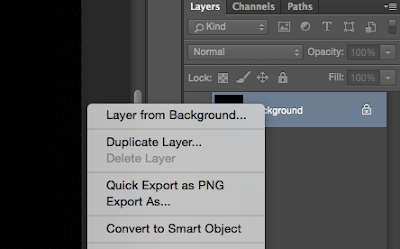
I open my final stacked TIFF in Photoshop and duplicate the background layer into a new layer.

photoshop high pass layer
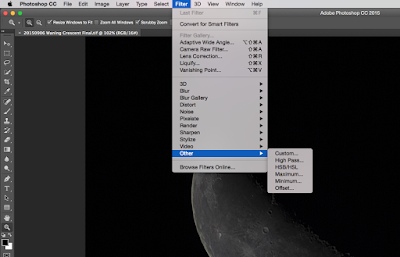
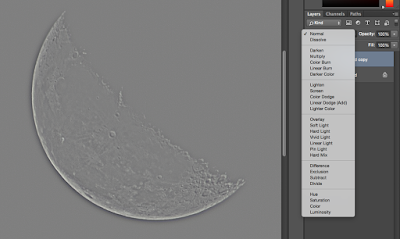
This becomes my High Pass layer. Even if you don't want to spend a lot of time processing each moon image, a High Pass layer is often worth while and doesn't take too long. To make it High Pass just go to Filter > Other > High Pass.

photoshop high pass layer
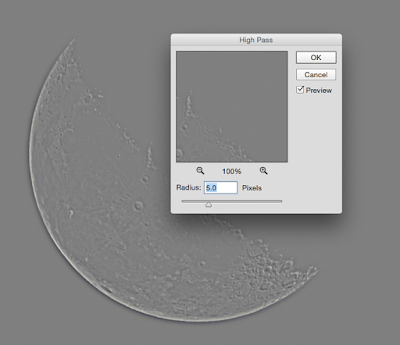
I usually go between 5 and 7 pixel radius for this High Pass filter, but you can play with different amounts.

photoshop high pass layer
Change the layer to an Overlay layer

photoshop high pass layer
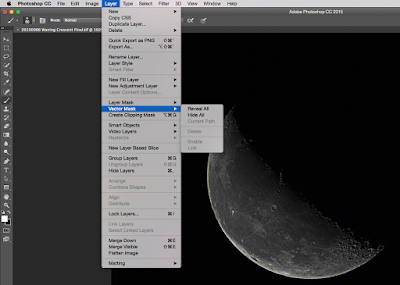
And make the High Pass layer a mask, and select 'Hide All'

photoshop high pass layer
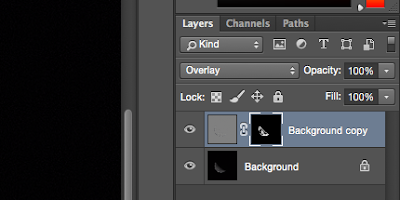
Now using a brush, coloring on the moon will reveal the High Pass layer. I use a wide blurry brush, and turn the flow rate down. See on the layer preview the white part is being cut through the mask.

photoshop high pass layer
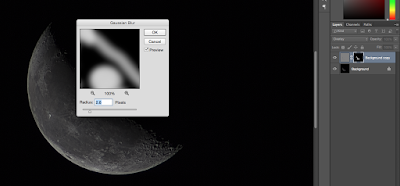
If you didn't blur your brush, go ahead and add a blur filter to your layer. This will help blend the border between where you are using the High Pass layer and where you aren't. I usually stay away from the very edge, and focus on bringing out crater ridges.

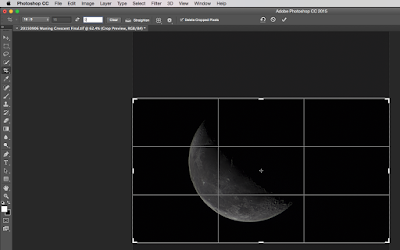
photoshop crop
Crop your final image down to however you want it.

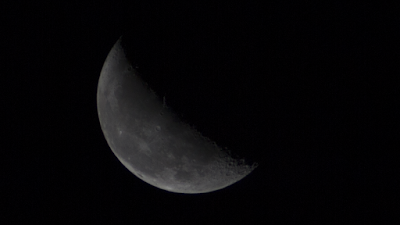
moon single frame canon t5i
Was it all worth it? Here is a frame straight out of the camera... and then...

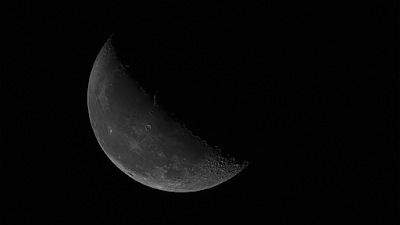
waning crescent moon t5i
Here is my final version, stacked, and edited with a High Pass layer. 22 frames stacked, each at 300mm, f/7.1, ISO 100, 1/250 sec. I also turned the saturation down because I wanted this one to be black and white. Sometimes a little color on the moon is nice, but again it's a personal preference each time.

iPhone Moon Photo Process and Settings with Manual Camera App

This post describes the process and app settings I used to take a properly exposed photo of the moon using an iPhone 6 without additional lenses or digiscoping methods - essentially straight from the camera. This is the process with no external or extra lens attached to the iPhone. I'll break down the process into the sections of Setup, Settings, and Production. So first, let's look at the setup.

Setup

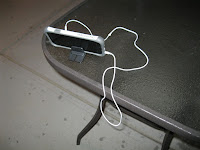
My setup tonight was just my iPhone 6 with no additional lenses - but that doesn't mean no additional gear at all. I used a piece of plastic that I think was originally meant to hold up your phone if you are watching a movie. I also used my headphone volume shutter release made from a pair of iPhone headphones (basically just the headphones with the earbuds cut off but keeping the volume button as a shutter remote).

iphone night sky photographyiphone night sky photography


Settings

Next, let's look at the app and settings. I used an app called Manual - Custom exposure camera by Little Pixels. I manually adjusted the shutter speed to 1/250 seconds and the ISO to 34. I left the focus on Auto. Then I zoomed in by touching 2 fingers to the display area and spreading them apart. I zoomed all the way in to 3x digital zoom. Digital zoom isn't going to make my actual moon photo any bigger, but it will help me see the exposure better before I take my photos.

These settings worked for my waning crescent moon, which is dimmer than a full moon. If the moon is fuller and brighter you'll want to use an even shorter shutter. The moon is relatively bright, and a lot of times people think they need a long shutter to take night photos, but if you use a long shutter on the moon it will be washed out and over exposed.
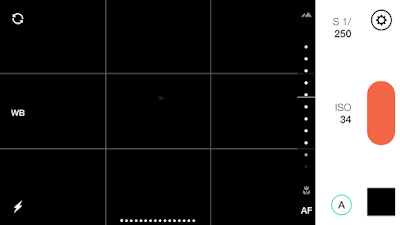
manual camera app
In the image data, ISO 34 actually shows up at ISO 32, but hey it's close enough!

Production

I took 18 photos back to back quickly with my volume button on the Apple headphones. I uploaded them to Box so I would have them on my laptop.

I opened the photos in a program called Registax, it's free software that lets you stack multiple photos on top of each other to average out the noise in each image leaving a better approximation (the average) of what is truly there beyond the distortion.

I used 3 alignment points because the face of the moon is so small in the iPhone photos. I didn't tweak much, but it did clean up the image a bit.
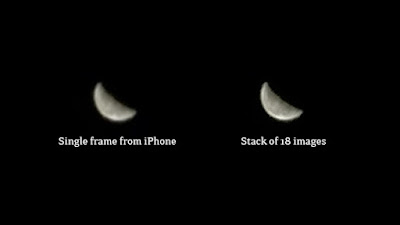
iphone moon photo
Stacking the iPhone moon photos wasn't exactly a waste of time, it did manage to clear it up a bit

I normally do a High Pass layer and make all kinds of subtle adjustments in Photoshop, but there just isn't a whole lot to work with here, so I desaturated the moon to get rid of the yellow and that's it!
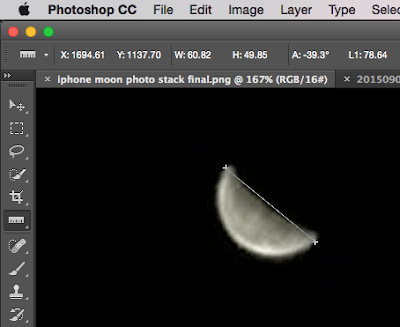
how big is the moon in iphone photo
I measured the diameter of the moon in the iPhone photo at about 78 pixels, let's round up to 80. 

The moon is about 80 pixels in diameter. This is an improvement from when I tried this on the iPhone 5, in which case the moon was about 50 pixels in diameter.
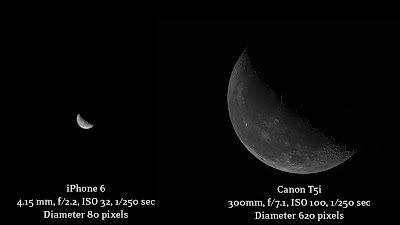
iphone vs dslr moon photo
Side by side look at the final product using the iPhone 6 compared to my Canon T5i

As you can see, taking moon photos on the iPhone with the regular camera lens leaves you wanting more. Granted, there isn't much to look at on the waning crescent side of the moon's face, and with a full moon you can at least see a little bit more contrast in the iPhone image. But when you look at it next to a 'regular' moon photo, in this case one taken with my Canon T5i DSLR on the same night, it's painfully obvious that the iPhone is better used for digiscoping the moon and not taking photos outright.