Tuesday, November 26, 2013

What is My REAL Astrological Sign? Lookup Sun Position in Stellarium

I grew up thinking that Astrology had a lot to do with Astronomy, but the more I learn about astronomy the more I realize how astrology is (even more) ridiculous. I figured that the typical date ranges represented the position of the sun in the constellations at some point in the past, and that people ascribed some kind of meaning to that.

horoscope dates
Table from horoscopedates.com


I never thought twice about how the date ranges were evenly split into 12 month long segments. But once I started to learn about the night sky and the constellations, it became obvious that the Sun, Moon, and planets only pass through small segments of some constellations, and spend weeks in others. In fact, the sun spends 44 days in Virgo but only 7 days in Scorpius. The Sun spends 18 days in Ophiuchus and it isn't even included in the classical zodiac! You can look up your astronomical (rather than astrological) sun sign here.

The classic date ranges are supposed to tell you where the Sun was at the moment you were born, but they can be way off (or not even include your constellation at all). To tell where the Sun actually was at the moment of your birth, just download Stellarium and go back in time to find out. You can look at the position of the Sun, Moon, planets and stars from anyplace on Earth at any time. 

I was born at approximately high noon on Friday, December 30, 1983 in Dayton, Ohio. Here is my Sun position chart at that exact time and location. You can see that the Sun was firmly in Sagittarius and nowhere near Capricorn. The red borders define the borders of the constellations' regions in the sky - sort of like counties used to determine a celestial address.

real astrological sign
Sun position at the moment of my birth

So all this time I've been a Sagittarius and not a Capricorn! I even have a Capricorn tattoo on my torso!

Zodiac floor mosaic Holcomb Observatory Butler University
Zodiac floor mosaic at the Holcomb Observatory and Planetarium at Butler University

Saturday, November 23, 2013

Working on Lunar Geography: Riccioli Crater

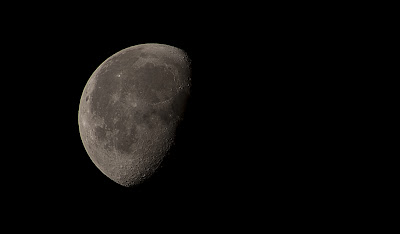
Riccioli crater is an addendum to this month's observing list, and it was easier to spot than Mare Humboldtianum. I took a stack of 54 images this morning after looking for ISON.

I need to get my scope out to see it close up, but it was faaa-reeeeezing this morning and I didn't feel like it #lazy. Come closer to my balcony so I don't have to go outside!

Riccioli Crater

waning gibbous
54 images stacked in Registax, each at 1/250 sec, f/11, ISO 200, 300mm

Nov. 23: Unable to Spot ISON in Cold November Sky over Indiana

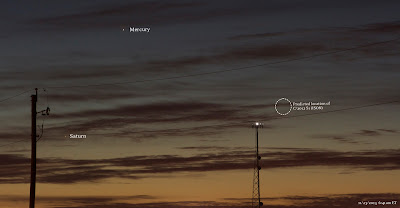
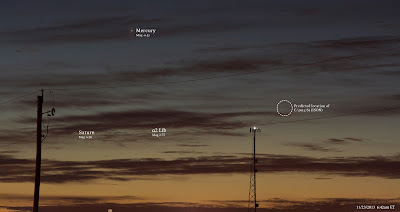
I set an alarm this morning to get up at 6:25am ET and head out to look for C/2012 S1 (ISON). There were some thin clouds along the horizon which didn't help my search at all. I scanned back and forth looking through my viewfinder, and snapped dozens of photos hoping to catch ISON poking through the clouds. All I came away with was one questionable smudge, and no confirmation of ISON in its predicted position. I guess it's just too low to the horizon, meaning more atmosphere in the way and too close to the light of the rising sun to show up.

Latest updates on Comet ISON. Looks like it's predicted to be visible again by December 1 and up above the treeline by December 5. I thought it was going to go to the other side of the sun and be visible after sunset, but it looks like it will stay a morning comet. So much for my West-facing balcony :(

ison watch indiana november 23
f/5.6, 2 sec, ISO 400, 120mm, small smudge in circle maybe?? Height of cell tower is about 4°

ison watch indiana november 23
f/5.6, 2 sec, ISO 400, 120mm

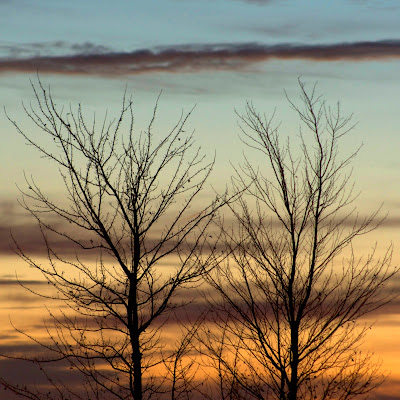
november sunrise
f/5.6, 1/2 sec, ISO 200

Wednesday, November 20, 2013

Morning Moonset

moonset
11/18/2013 7:33am ET, 1/320 sec, f/5.6, ISO 200, 55mm

moonset
11/18/2013 8:08am ET, 1/500 sec, f/10, ISO 250, 300mm

I came outside to let the dog out and saw a bright moon hanging low over the pink and orange sky to the West. It was so bizarre, because the sky was already relatively bright, but the moon still looked like a spotlight overhead. By the time the moon got low to the horizon, the sky had brightened up further, leaving the moon a ghostly white disk you'd miss if you weren't looking for it.

Trying to Find Mare Humboldtianum

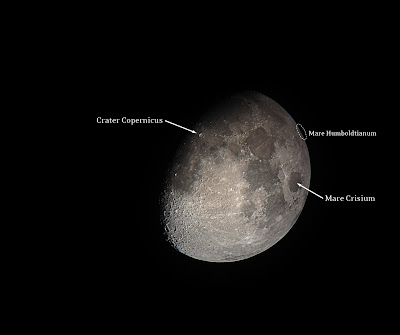
As an alternative for those with technical limitations, Mare Humboldtianum was included on the November Observing List as an additional option. I figured this meant it would be easy to find - but I was wrong! Mare Humboldtianum is so far on the outer edge of the moon it's barely visible as a little dark dent in the disk's perimeter.

Mare Humboldtianum

The reason it's so hard to see is due to lunar libration - or small oscillations that tilt the moon away from its average position. Although the Moon is tidally locked to the Earth, it still wiggles a bit - sometimes due to our perspective and sometimes due to its tilted axis and elliptical orbit.

Thursday, November 14, 2013

Icy Ring Around the Moon

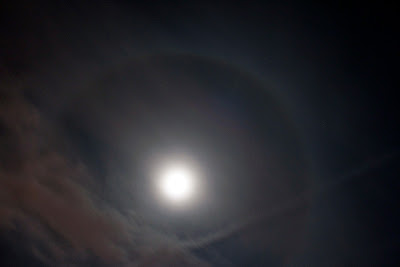
It's cold and windy here in Indiana, but there's a faint 22° halo around the moon. As light passes through hexagonal ice prisms, no light leaves the prisms at an angle less than 22° making a distinct light/dark boundary with a radius of 22° radiating out from the moon.

This is only my second time seeing a lunar halo. I got much better photos compared to my first attempt last winter.

halo ring around the moon
Instagram's HDR filter really brings out the contrast along the light boundary

ring around the moon
Beefed up in Photoshop, the halo is still pretty faint

lunar halo
This is a pretty good visual approximation of what was actually in the sky, very faint but definitely visible

ring around moon Indiana
Another shot, auto contrast and color in Photoshop

halo around moon Indiana

Comet Lovejoy (C/2013 R1) November 14, 2013

Comet Lovejoy: 107 subs, 29 darks, 42 bias, 300mm, 1.3 sec, f/5.6, ISO 1600

I heard Comet Lovejoy was showing up better than Comet ISON, and boy is it! Because Lovejoy is higher in the sky, there's a lot less atmosphere between this dirty snowball and my camera. I took these photos at 6:00am ET on the morning of November 14, 2013.

My stack of 107 light frames shows a bright coma but not much color due to the short exposure time (1.3 sec for each frame). In a longer exposure, the comet and stars form streaks across the sky, but the cool emerald color of Lovejoy's coma is very nice.

Comet Lovejoy: Single frame 8 sec, ISO 1600, f/5.6, 300mm
Looking at the individual frames, I noticed the comet is very close to a 9 magnitude star which creates the appearance of a dense point of light in the center of the coma. Sadly, the comet is all green fuzz from my perspective, but the adjacent star makes it look like it has a visible head.

Wednesday, November 13, 2013

DIY Homemade iPhone Telescope Attachment Adapter Mount

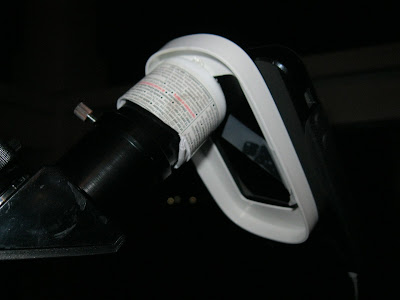
I love taking photos of the moon through my telescope with my iPhone, the camera is really small but sharp and high resolution. The hardest part is keeping the camera centered over the eyepiece. You can try snapping a pic handheld, or constantly adjusting a tripod pointing down through the eyepiece, but if you really want to get a good photo you need to have a mount attachment to keep the camera steady. There are retail iPhone telescope adapters available ($50 to $70), but making one out of junk can be fun too!

DIY Homemade iPhone Telescope Attachment Adapter Mount
DIY iPhone telescope attachment adapter mount thing!

I used the "random crap around the apartment" approach, so first I'll explain the components in basic terms so that you might find something suitable if you don't have exactly the same things lying around, and then I'll show you how I made mine.

You'll need:
  1. A platform - something about the size of your phone that is sturdy, flat, and light weight so that it can hold the phone up without bending. In my case, I used a plastic insert from an Apple mouse package. You could also use wood, other bits of plastic, or a long metal bolt.

  2. A cup or clamp - something to go over the eyepiece or clamp around the eyepiece that attaches to the platform. In my case, I used a plastic medicine bottle. You could also use a film container (if those still exist), a cap from a travel size shaving cream canister, or anything about the right diameter and long enough to go down the eyepiece a ways. 

  3. Adhesive - some way of attaching the cup to the platform. Hot glue would probably work best, but I used sticky dots and it worked just fine. iPhones don't weigh that much so it shouldn't be a huge deal.

  4. A hole - you'll need a way of cutting a hole in the cup. I used kitchen scissors and it was sloppy but fine. A drill would make it nice and neat, but do what you can.

  5. Snug-ification - you'll need a way to make the cup snug around the eyepiece so that it can hold the DIY mount onto the phone. If you're using a clamp instead of a cup, you'll need a way to tighten the clamp. If you're using a cup, you just need something with a little bit of give to go around the eyepiece. I used paper, you could also use foam, cotton, cardboard, or whatever.

  6. A seatbelt - you'll need some way of attaching the phone to the mount itself. My regular phone case has some silicone on it, so if my scope is relatively horizontal it can grip a little bit on its own. For more vertical angles, I use a bit of tape on the back of my phone and it's fine. You could also use a rubber band, a neoprene sleeve, a wire, or make the mount out of an old iPhone case itself.

DIY iPhone telescope
I found a plastic insert from an Apple mouse package, and a generic allergy medicine bottle about the size of my eyepiece

phone telescope adapter mount
I cut the medicine bottle in half and cut a hole in the bottom. I glued it into the corner of the Apple mouse package insert

phone telescope adapter mount
I made sure the hole was big enough to fine tune my iPhone placement with different eyepieces if needed

glue spots
I used glue dots, but any kind of strong glue will work. Don't get glue on your eyepiece!

phone telescope adapter mount
The bottle was almost the right size, but I stuck paper in the plastic cup for a snug fit

DIY iPhone telescope mount
The plastic cup is deep enough and snug enough to hold the iPhone out horizontal without bending

DIY iPhone telescope mount
I used some tape once I had the iPhone in the right position over the eyepiece

DIY iPhone telescope mount
And I used the Apple headphones as a shutter release for the default camera app in video mode

iPhone moon photo
Here is a screenshot of the video, not bad!

iPhone telescope moon photo
Here is the final product after stacking 15 sec of video in Registax (461 frames of AVI) punched up a little with a high pass layer in Photoshop

Tuesday, November 12, 2013

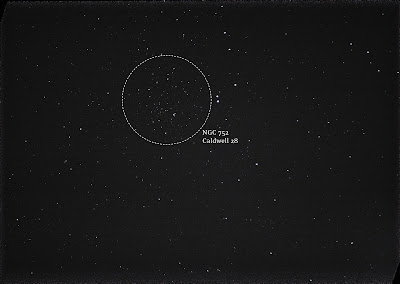
Deep Sky Mini Marathon: NGC 457 (Dragonfly Cluster), NGC 663, M34, and NGC 752

A Messier Marathon is an attempt to observe as many Messier objects as possible in a single night. I usually call my imaging binges Mini Marathons because I catch more than 4 deep sky objects on my memory card in one night (before the battery dies or the memory card is filled). With the addition of M34, my Messier tally is up to 36!

I got to check a bunch of these off my November observing list a few nights ago! While I've photographed NGC 457 and 663 before, it easy to spot them and give it another quick go around (this time knowing what I was looking for). I also got to check out the Dragonfly Cluster (aka the Owl Cluster aka the ET Cluster) at 300mm while before I was only at 160mm.

NGC 752 (Caldwell 28)
NGC 752 (Caldwell 28) Open cluster in Andromeda: 45 subs, 25 darks, 20 bias; 300mm, f/5.6, 1.3 sec, ISO 1600

Messier 34
Messier 34: 41 subs, 25 darks, 20 bias; 300mm, f/5.6, 1.3 sec, ISO 1600

NGC 457 (ET Cluster)
NGC 457 (ET Cluster) in Cassiopeia: 30 subs, 25 darks, 20 bias; 300mm, f/5.6, 1.3 sec, ISO 1600

NGC 663 and Messier 103
NGC 663 and Messier 103 in Cassiopeia: 40 subs, 25 darks, 20 bias; 300mm, f/5.6, 1.3 sec, ISO 1600

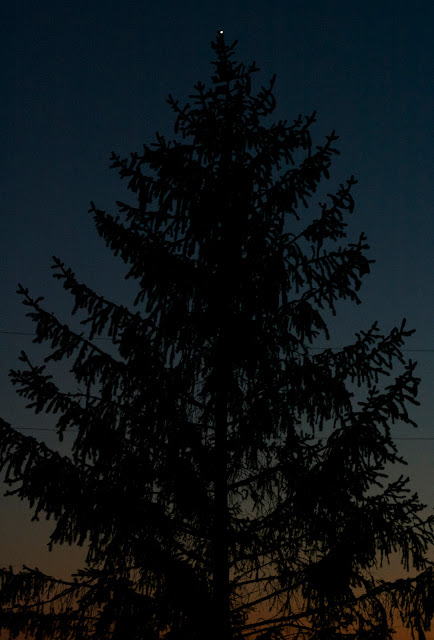
Twilight Perspectives and Venus in a Tree

I was inspired by Astro Bob's "Christmas conjunction" photos and wanted to take some twilight perspective shots of my own. I don't have any cool Christmas lights in my area yet, but I do have a couple pine trees. I wanted to see what I could do with Venus and the Moon relatively low in the sky, and also try some handheld shooting.

I'm an avid tripod and shutter release user, so handheld scares me a little when it comes to low light shots. But I do recognize that when it comes to getting the perfect angle for an alignment, you need the freedom to play a little to get it just right. Although I love my moon/wind chime alignment, it was a huge pain to run back and forth trying to find the right position from the tripod height and not my own perspective.

venus pine tree
Venus above a pine tree. Venus looks so big because the pine tree is in focus and Venus is out of focus.

venus in a tree
Venus in a tree at twilight, handheld with DSLR

venus pine tree twilight
Venus on top of a larger tree

venus pine tree twilight
Venus is the "star" on top of the tree!

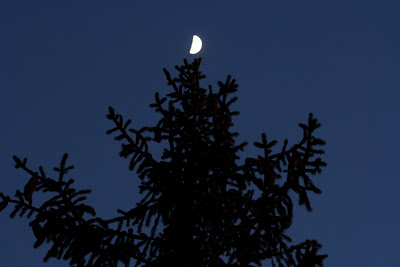
moon in tree twilight
This is the moon over a pine tree

Prime Focus Crescent Moon Frustration

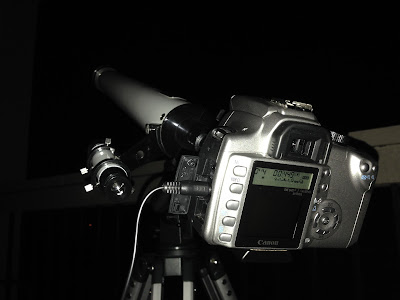
I made another moon attempt at prime focus last week and the results are frustrating. I just can't seem to get the entire disk in focus at the same time, and although the moon is much higher resolution at prime focus, my best clarity still came from digiscoping with my iPhone through the eyepiece.

So I either need a camera with live view so I can focus on a larger display (or a laptop) rather than through the tiny viewfinder, or an iPhone mount / adapter for the eyepiece. Or maybe video is just the way to go, and stacking 20 frames won't cut it at higher resolutions. Since my DSLR doesn't do video, this is still a problem.

Canon Rebel XT (350D) at prime focus on Meade 285

Crescent moon at prime focus
Crescent moon at prime focus, 20 frames stacked in Registax

Saturday, November 9, 2013

Comet ISON with Beta Virginis November 7, 2013

I've been reading a lot about Comet ISON (C/2012 S1) already visible to amateur astronomers in the early morning sky over the Eastern horizon. At magnitude 7.50 on the morning of November 7, 2013 I figured I could try to pick it up with the DSLR and 300mm lens. After all, I've picked up magnitude 9 or 10 stars through stacking in DeepSkyStacker (DSS), and since a comet is more compact than a galaxy (whose visual magnitude is spread out over a greater area) I knew I could grab it.

comet ison 300mm nov 7
11/7/2013 at 6:00am ET Stack of 62 subs, 32 darks, 0 bias, ISO 1600, 300mm, f/5.6, 1.3 sec


It was very easy to find Comet ISON in the sky, below Mars and right on top of Beta Virginis (β Vir), one of the brighter stars in Virgo. They were actually about 24 arcminutes apart (less than 1°), and both easily fit into my field of view - which was good because I couldn't even see ISON in my view finder. ISON was relatively high in the sky, about 28° alt, which was different for me because the only two comets I've photographed previously have been about 10° above the horizon at twilight.

comet ison 300mm nov 7
Stack of 62 subs, 32 darks, 0 bias, ISO 1600, 300mm, f/5.6, 1.3 sec

While I was stacking these, I had something happen that's never happened before. I got an error in DSS that said "only one frame (out of 62) will be stacked. You should check/change the star detection threshold to detect more stars and help DeepSkyStacker find a transformation between the reference frame and the others."

DSS error only one frame

I had the star detection threshold on the lowest setting (2%) which tells DSS to treat anything that looks like a star as a tracking/alignment option. In photos of the Milky Way, having DSS on 2% would produce tens of thousands of traceable stars (and take forever to stack). However, in my light frames, DSS was only picking up 6-9 stars.

To solve this problem, I went back to my RAW files in Adobe Camera RAW, and lightened the frames up so the stars that were in the frame would be brighter and easier for DSS to pick up. I saved them as TIF files and loaded them into DSS. Then I got an error saying my light and dark frames were different file types, so I had to go back and save my dark RAW files as TIF files just to make them match.

In the end it worked, and I'm pleased I was able to troubleshoot this little issue on my own while still producing an image of Comet ISON.

Thursday, November 7, 2013

Warp Speed or Star Smoke Trails

Warp speed! This is a 6 second exposure of the Hyades cluster. During the exposure I zoomed in from 75mm to 300mm, making it look like we're flying toward the stars at high speed, or maybe they're flying with little smoke trails behind them.

Star Smoke Trails
Hyades cluster from 75mm to 300mm in single exposure
Star Smoke Trails
Orion's belt from 75mm to 300mm in single exposure

Color Comparison: Betelgeuse, Aldebaran, and Rigel

I took blurry photos of some popular stars to spread their light over more pixels to give a better representation of their color. Hotter stars are white and blue, while cooler stars are red, orange, and yellow. I looked up the surface temperatures of each on Wikipedia. Obviously the image is a composite since these stars aren't right next to each other in the sky. I used the same camera settings for each, so Aldebaran is slightly dimmer.

Color Comparison: Betelgeuse, Aldebaran, and Rigel
300mm, intentionally out of focus, enlarged in Photoshop
Rigel is my favorite star by the way! Comparing the color of Betelgeuse and Rigel was the subject of one of my very first blog posts: Orion constellation with star labels with my point and shoot camera back in 2012.

November Morning Sky ft. Orion and the Seven Sisters

I woke up to take the dog out at 5:00am this morning, and saw that the sky was clear. Sirius and Jupiter were blazing in the crisp, alarmingly cool air. It's been raining for the past few days, so I was super excited to get outside and get some photos.

I started on the balcony with a wide angle shot of the Orion neighborhood (from Sirius to the Pleiades). I tried a bunch of different settings to see if I could stumble upon something cool, or find a way to increase the number of stars without adding to the light pollution. Here's the final result...

orion night sky 18mm
Final result with adjustments in Adobe Camera RAW
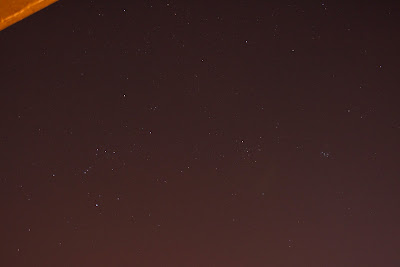
Below is the same photo pre-adjustments in Adobe Camera RAW. Notice the prevalence of sky glow and washed out stars. At least the stars were sharp, unlike the shot I took with the aperture wide open.Check out the results from a variety of settings...

orion and night sky f/4.5
Same photo as above, f/4.5, 15 sec, ISO 800, 18mm unprocessed


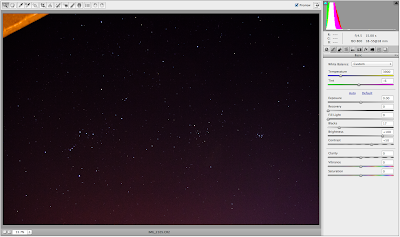
adobe camera raw remove sky glow
Screen shot of Adobe Camera RAW (check the settings on the right if you want to do something similar)

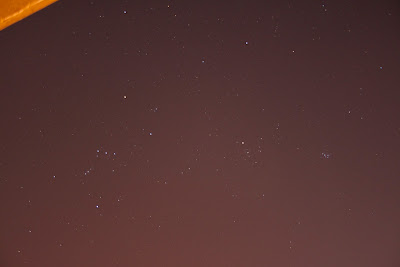
night sky f/3.5
Trying the same scene with different settings, f/3.5, 15 sec, ISO 800, 18mm (wide open aperture isn't as sharp)

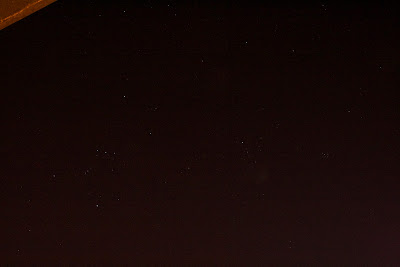
stars f-stop f/11
Trying the same scene with different settings, f/11, 15 sec, ISO 1600, 18mm (very sharp but not much light coming in)